How to manage your Acute Support Package in MyService
You can manage your Acute Support Package in MyService by:
- reviewing your package and support plan details
- keeping track of your allocated funding
- submitting receipts for services approved in your support plan (if applicable).
If you don’t have a MyService account, find instructions at How to set up a MyService account.
If you have trouble following this guide, contact us on 1800 VETERAN (1800 838 372).
This guide includes images of sample screens. The screens do not contain information about any real DVA clients.
Back to topStep 1 – Select Acute Support Package
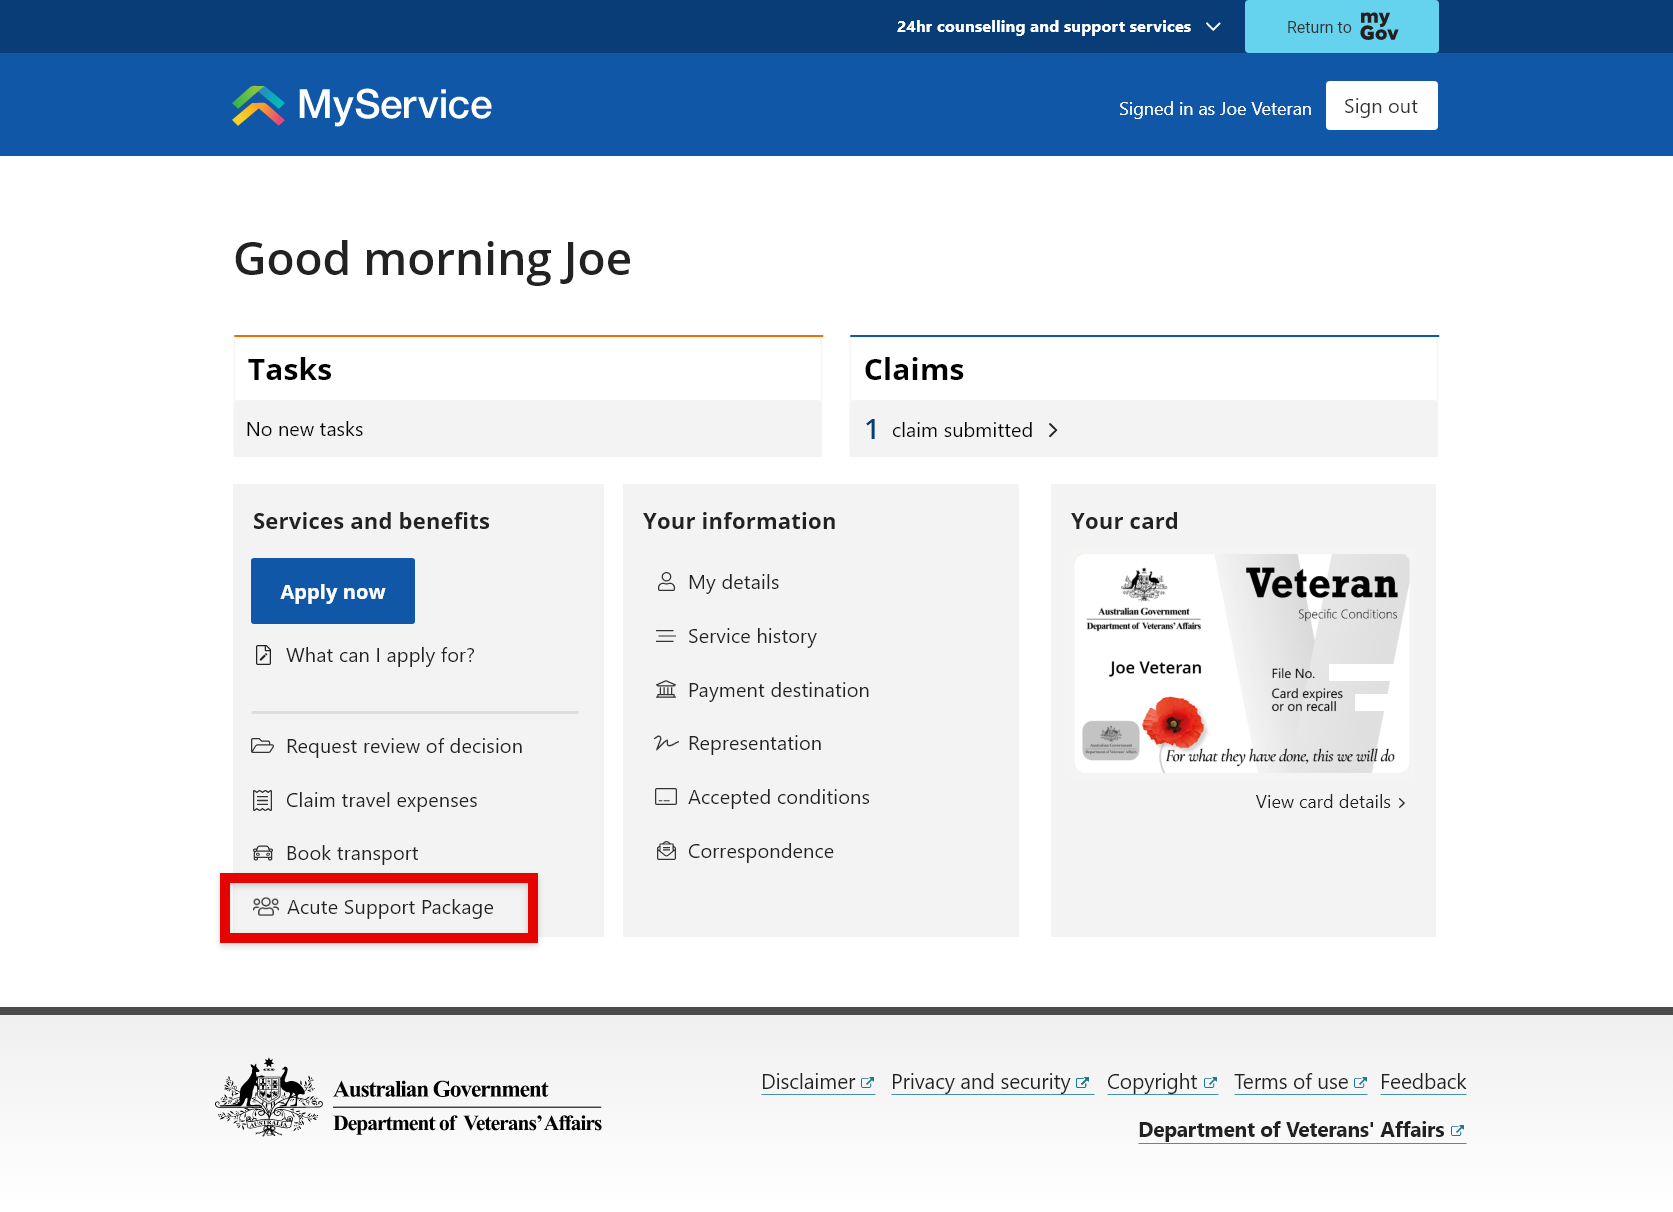
Sign in to MyService.
From the MyService home page find the Services and benefits section and select Acute Support Package.
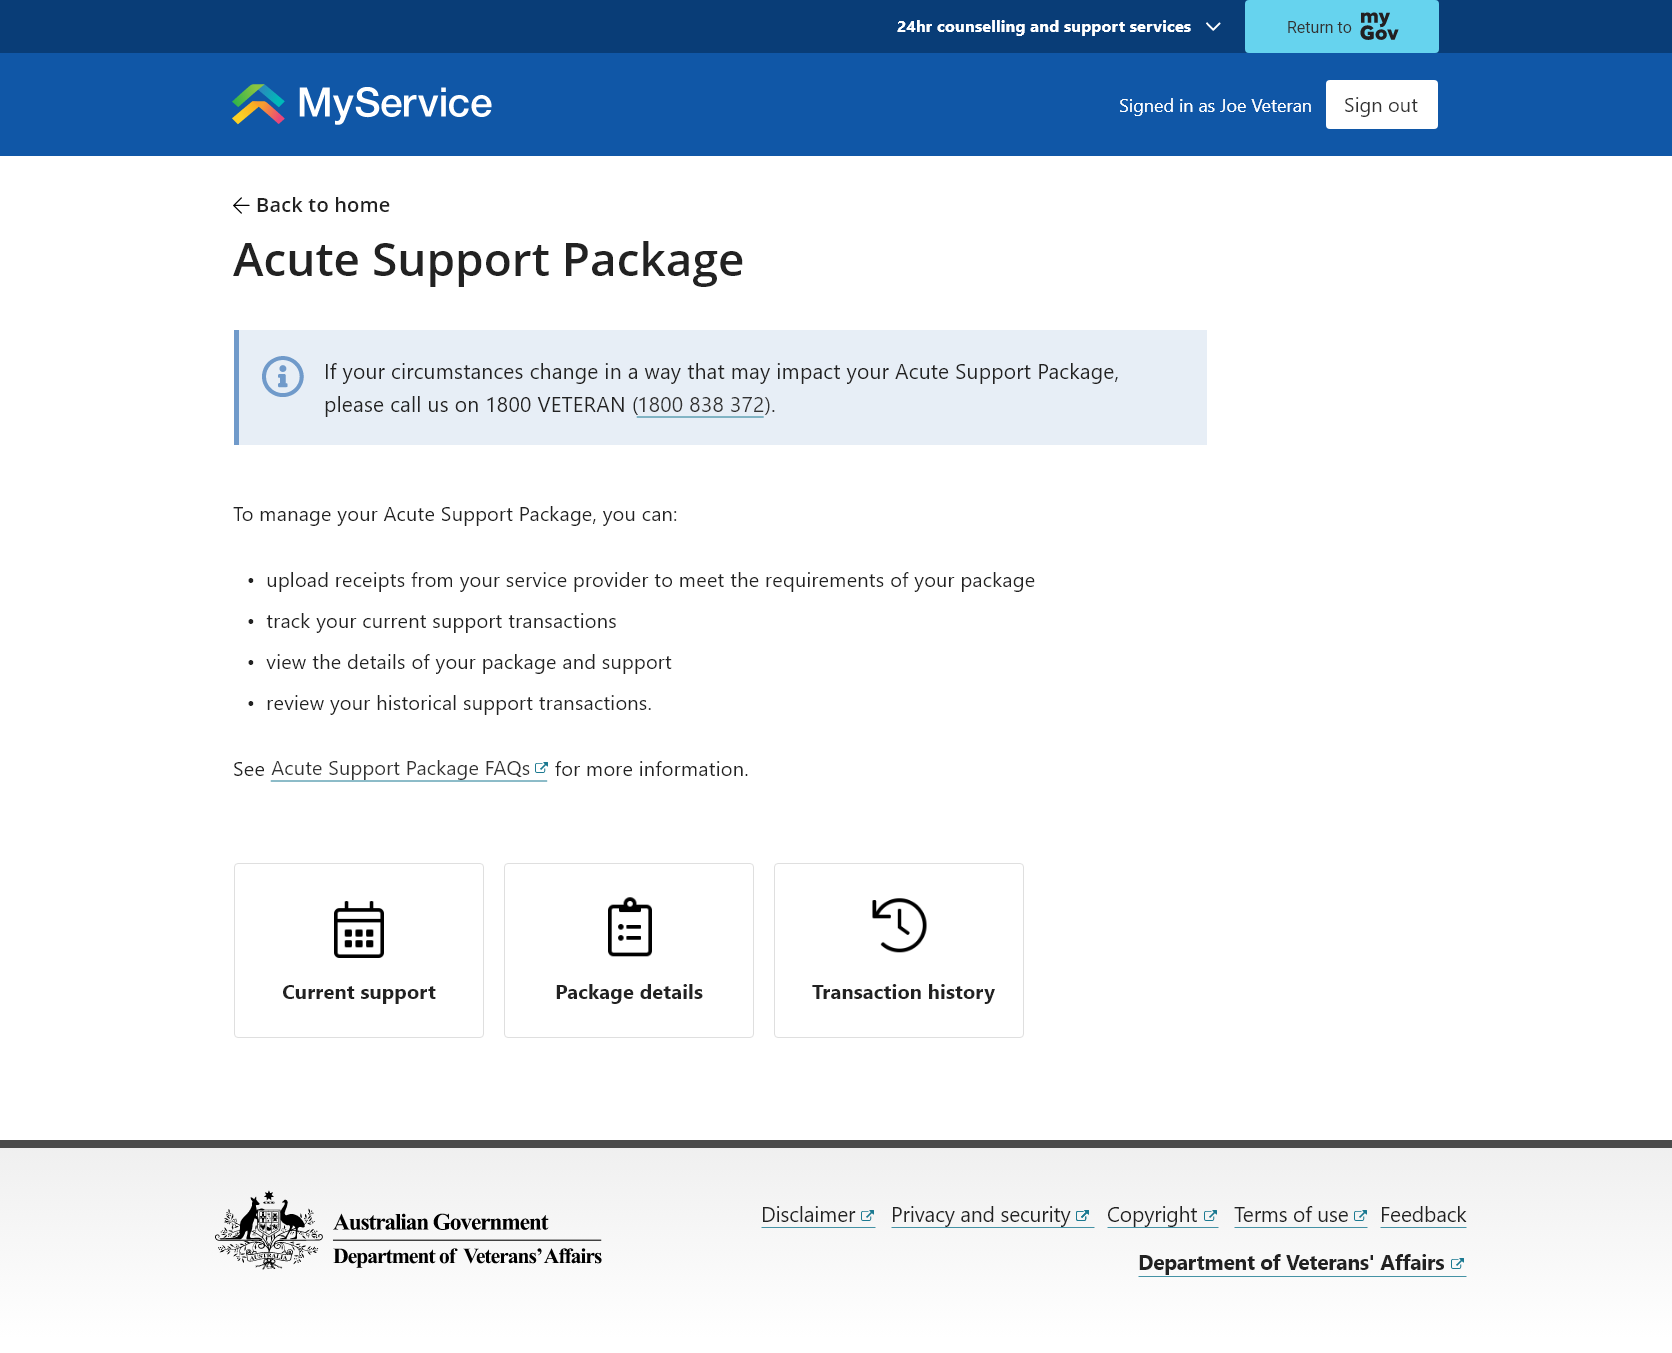
Step 2 – Access your package information
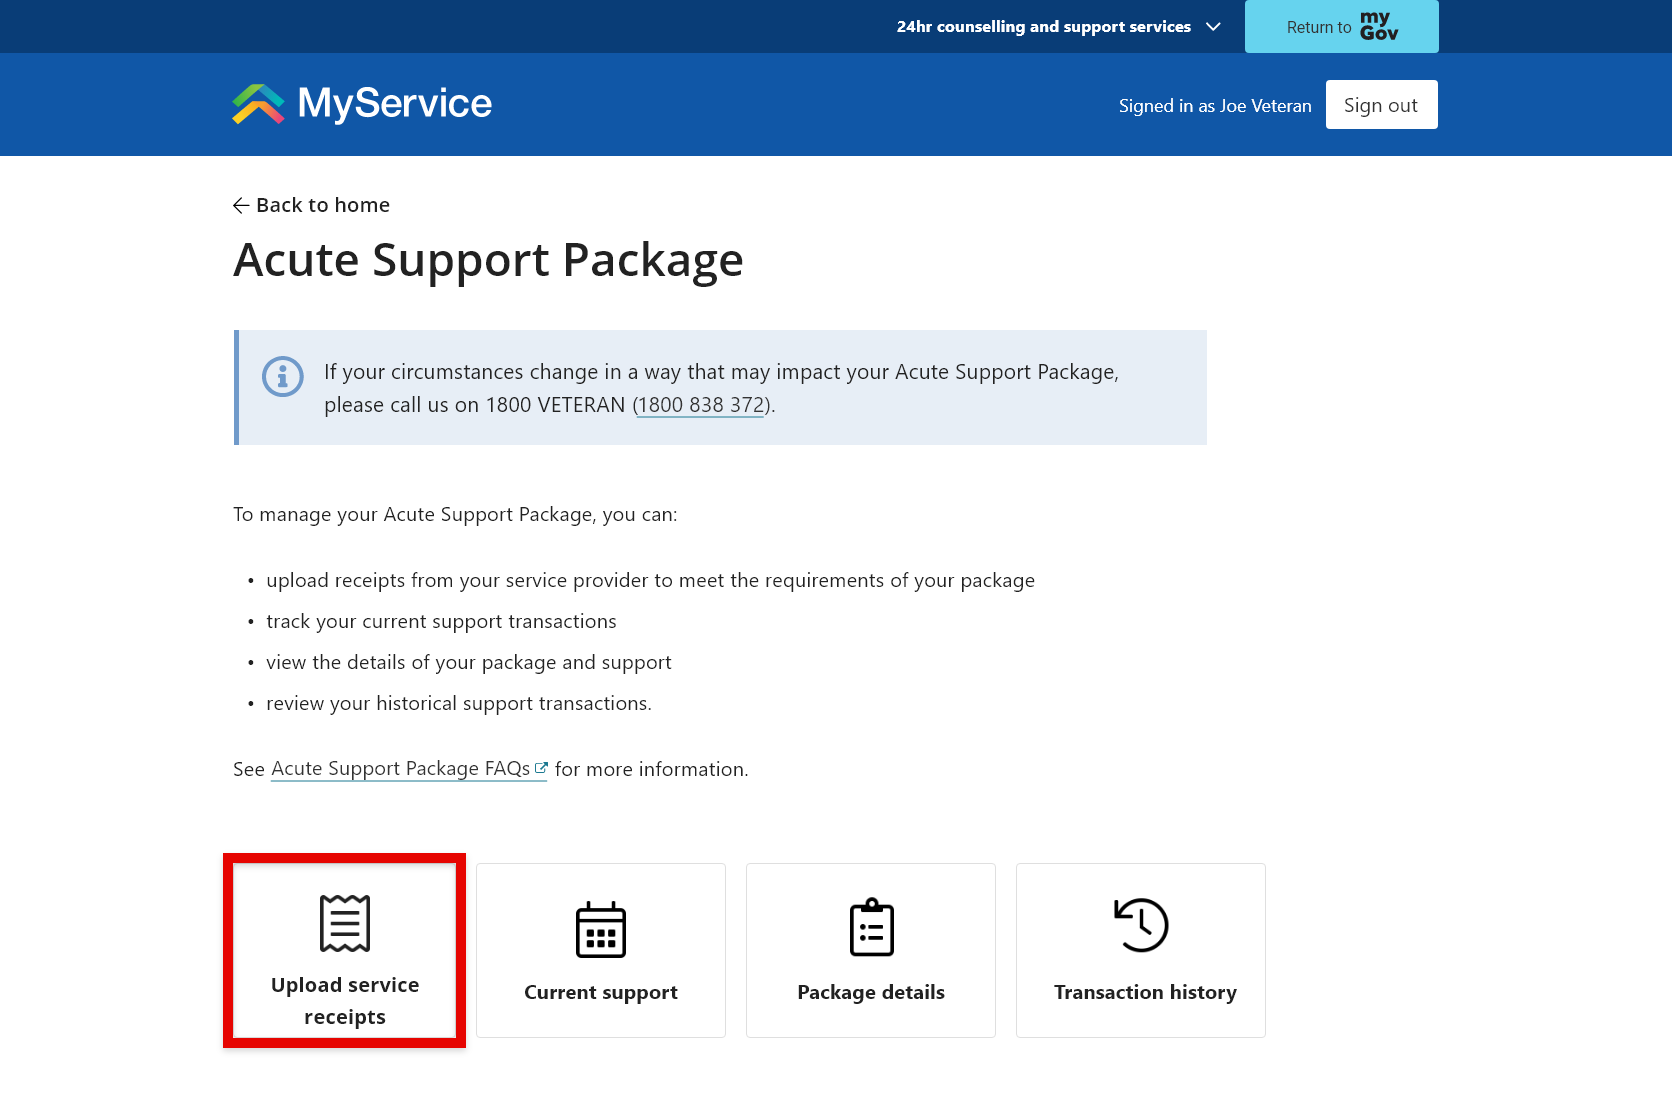
On the Acute Support Package screen you will find a series of tiles. By selecting these, you can access various details about your package.
These options may appear different for you depending on your package.
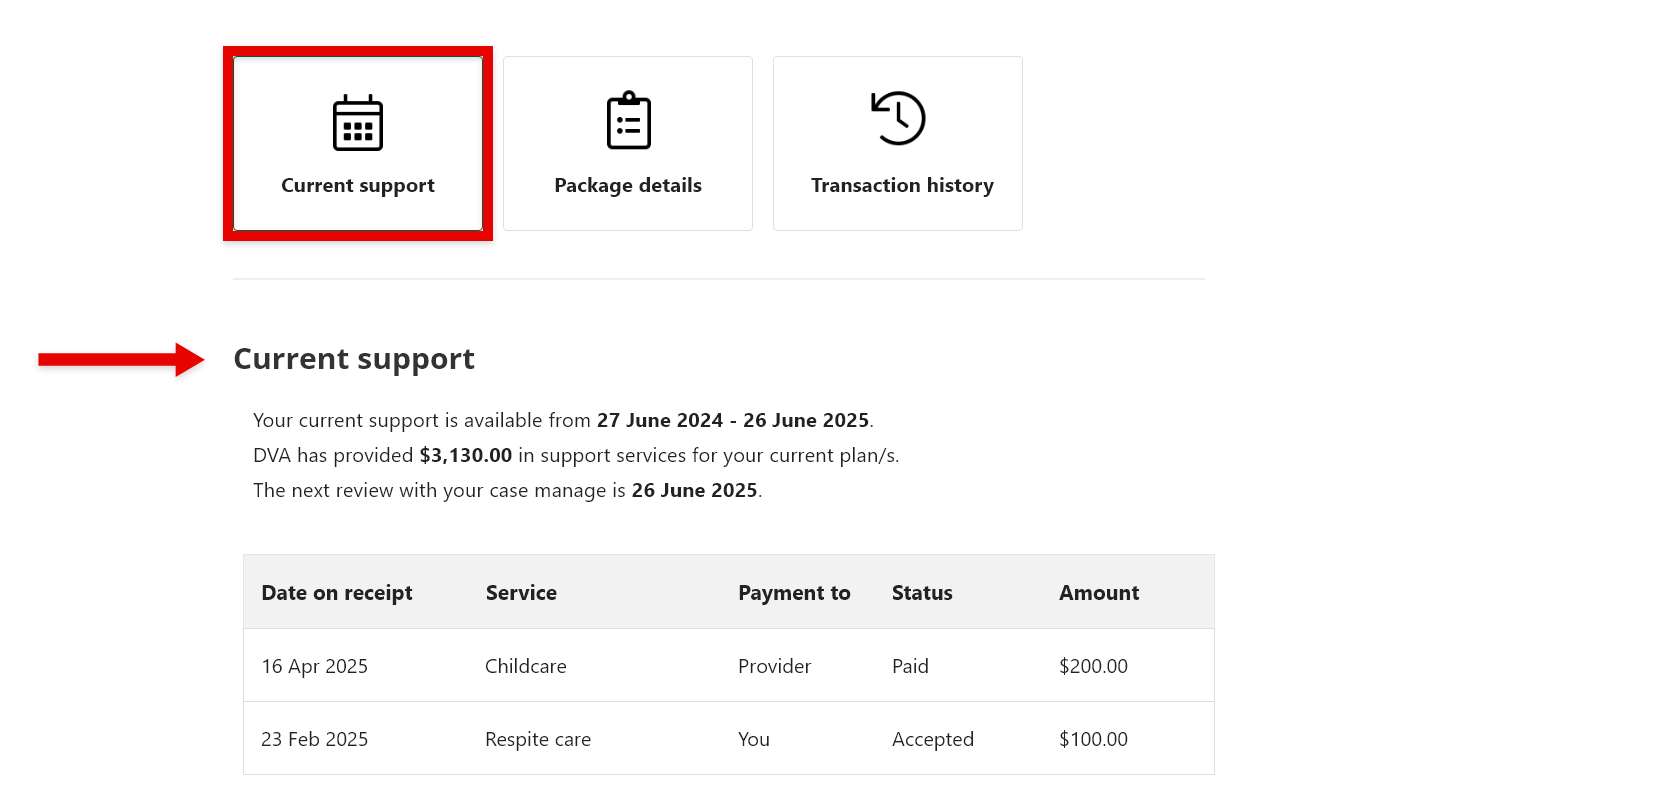
Current support
Select the Current support tile for your:
- support period timeframe and funding allocation
- upcoming review dates
- transactions for this period and to track their status.
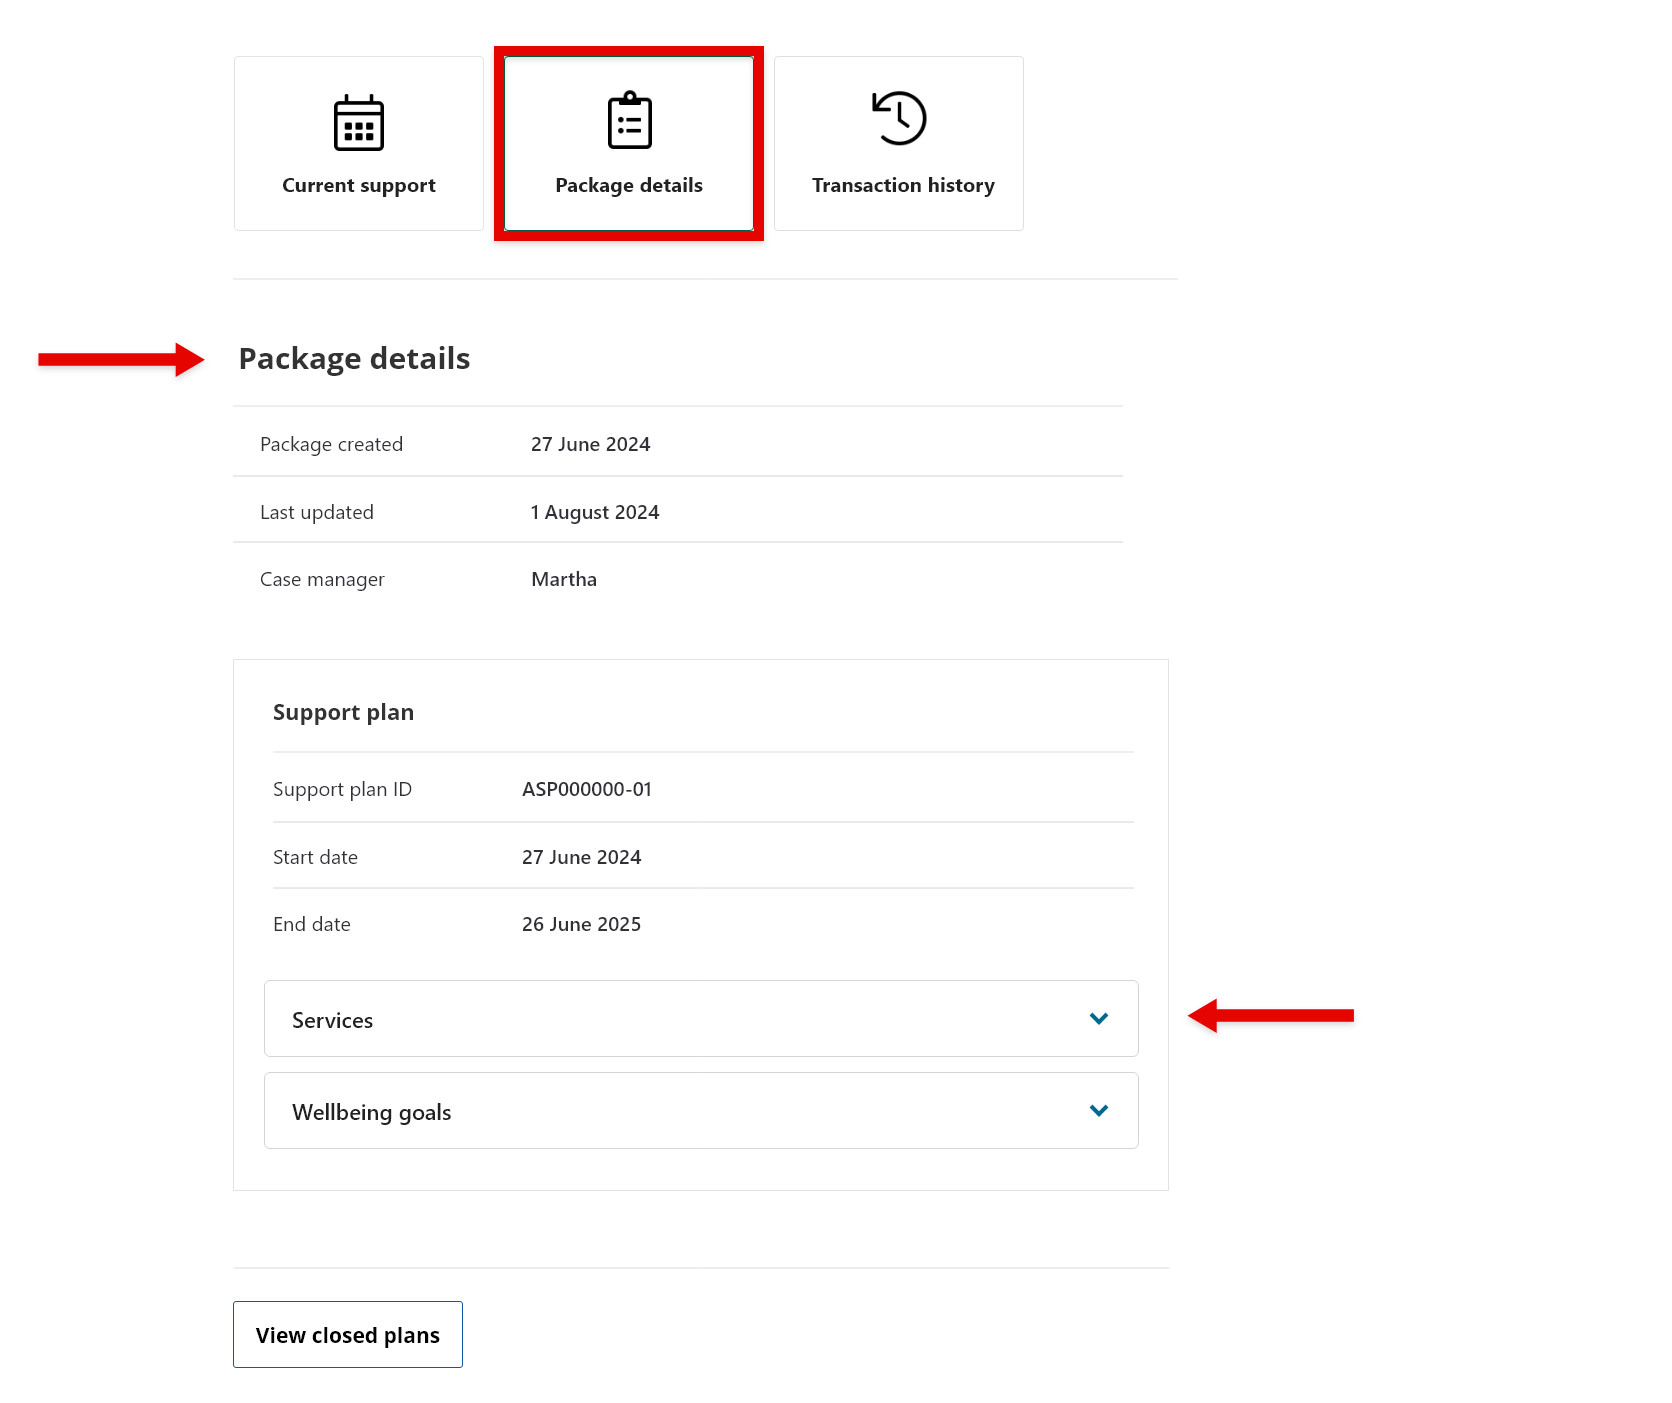
Package details
Select the Package details tile for details of your package and each of your support plans.
Within each support plan overview, you can:
- expand the Services section for the services you are eligible for, as well as the timeframe and funding allocated
- expand the Wellbeing goals section for the goals set for your plan, if applicable.
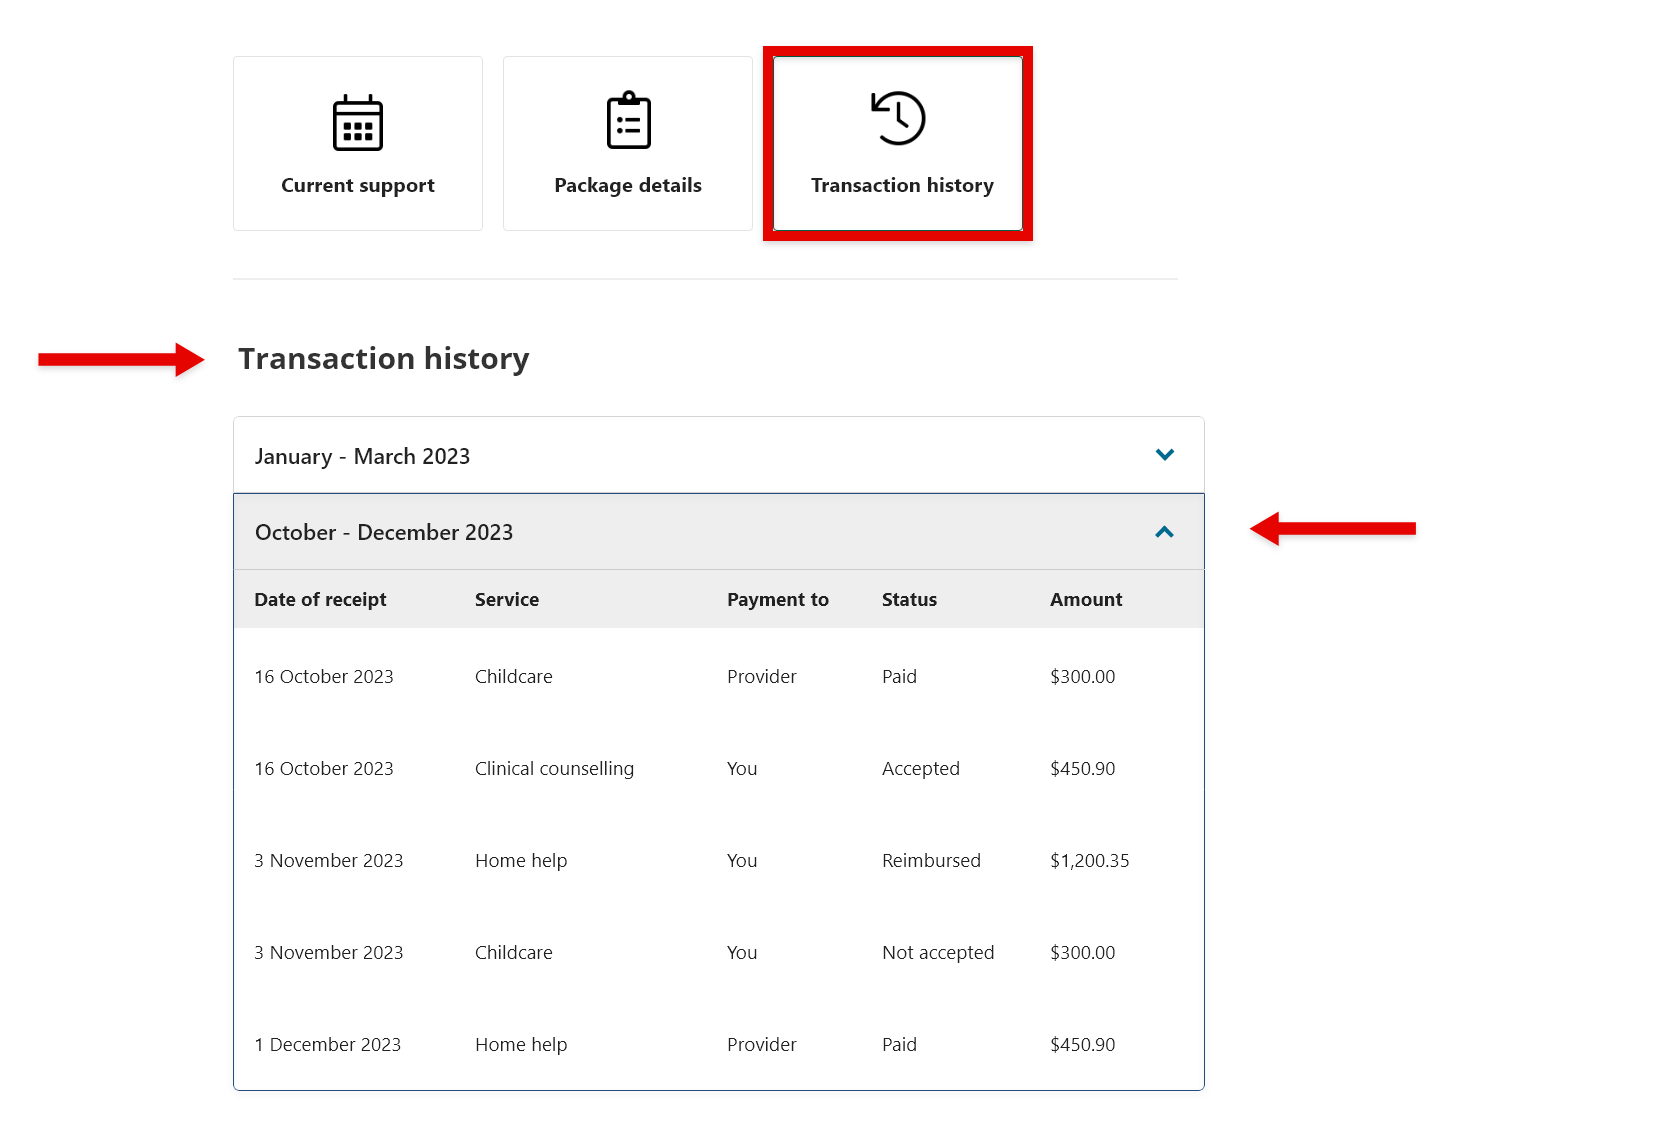
Transaction history
To review your past support transactions, select the Transaction history tile. Transactions are grouped into 3-month periods.
Selecting a funding period, for example ‘October – December 2023’, will expand the table containing the transaction details.
Note: If your support plan requires you to provide service expense receipts, refer to Step 3.
Back to topStep 3 – Upload service receipts (if needed)
If your plan requires you to provide service receipts, you will also have access to an Upload service receipts tile. To upload service receipts, select this tile.
This is where you can upload receipts in line with the requirements of your support plan.
You can add several receipts, which will appear as a list in this table. You can submit them together. We recommend adding no more than 10 at a time.
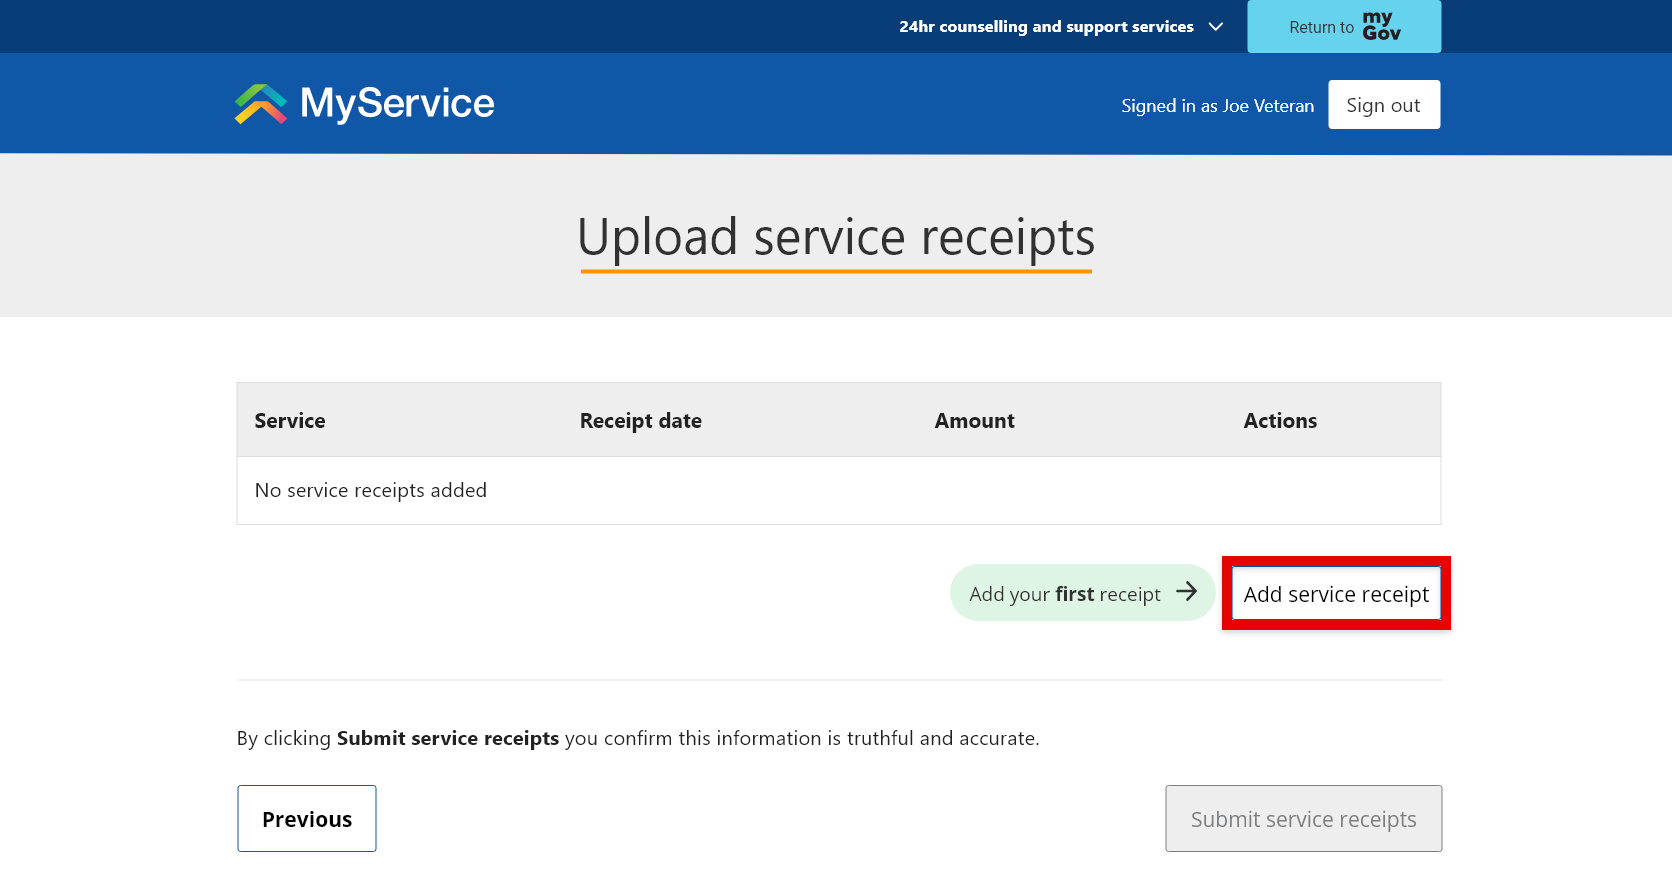
To add your first receipt, select Add service receipt.
Add a service receipt
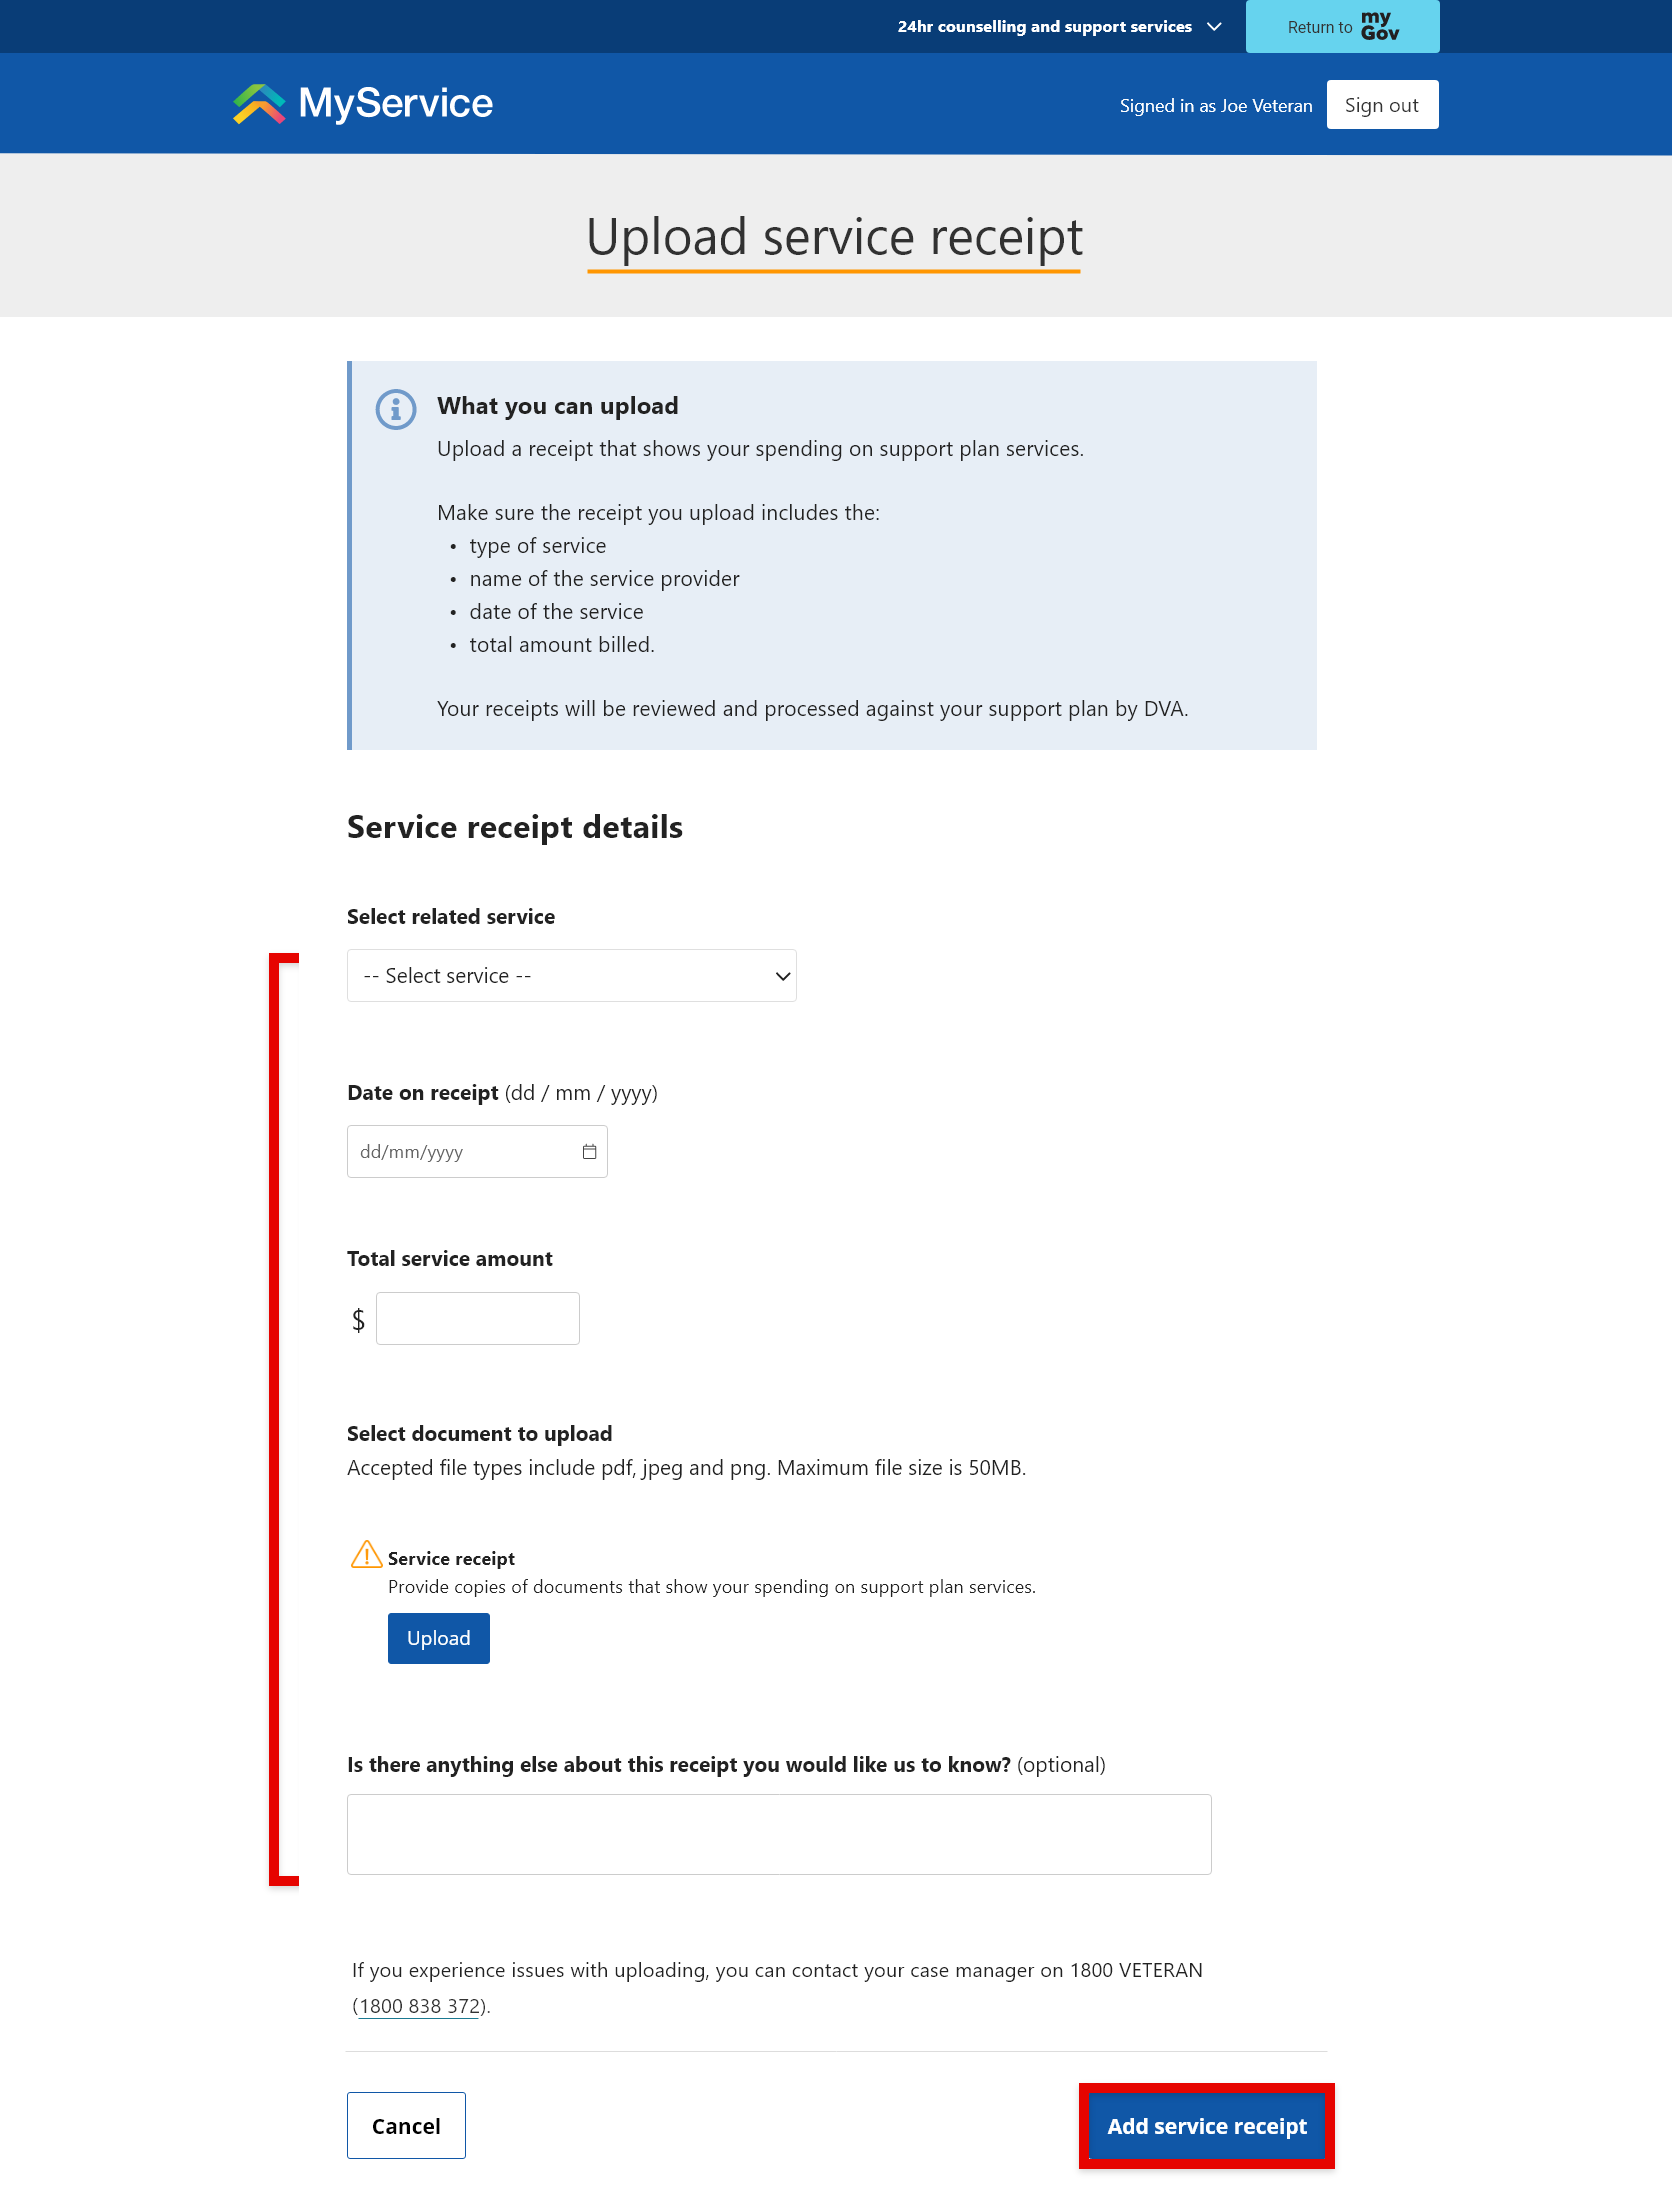
Provide the details of your service receipt.
Start by expanding the Select related service drop-down and selecting the allocated service related to the receipt you are uploading.
Then enter the date and total service amount shown on the receipt.
Select Upload and attach a PDF, JPEG or PNG file of your service receipt. The maximum file size is 50 MB. Ensure the document you’re uploading clearly displays the:
- type of service
- name of the service provider
- date of the service
- total amount billed.
Note: For each service receipt you add, you can only attach one document. If you upload the wrong document by mistake, select Remove and then Upload to add the right one.
You can also include additional information about your receipt in the space provided, but this is optional.
When you’re done, select Add service receipt.
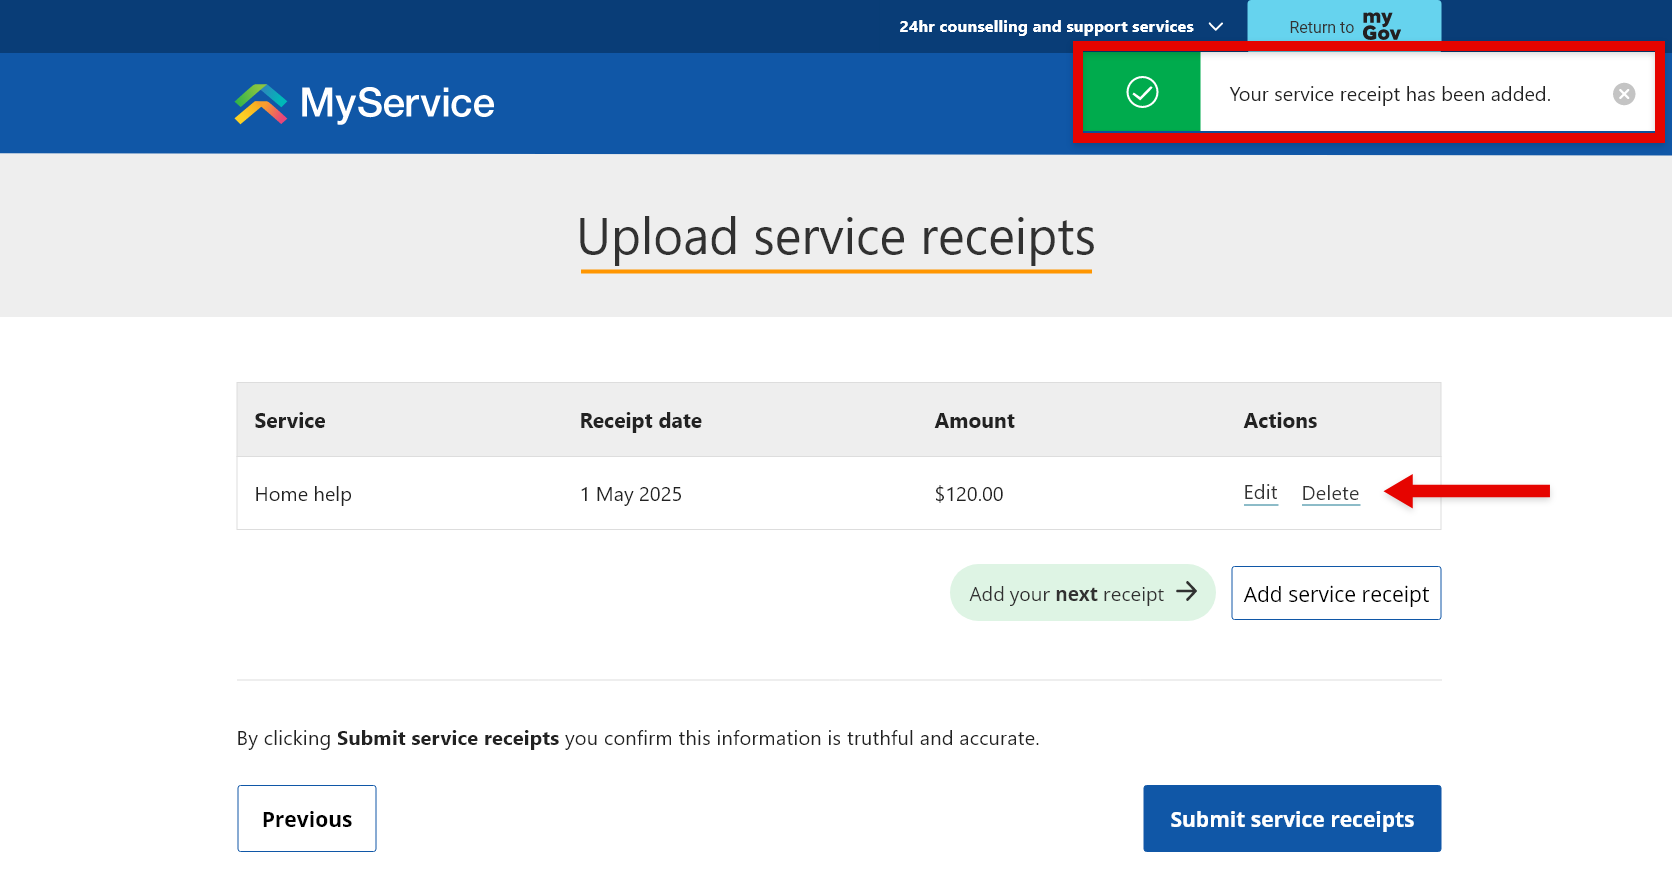
After you’ve added a receipt, the receipt details will appear in the list, along with a green success message at the top right of your screen.
You can Edit and Delete receipts from the list before you submit them. You will find these options in the Actions column.
Add another receipt
To add more receipts select Add service receipt.
When you’re ready, select Submit service receipts.
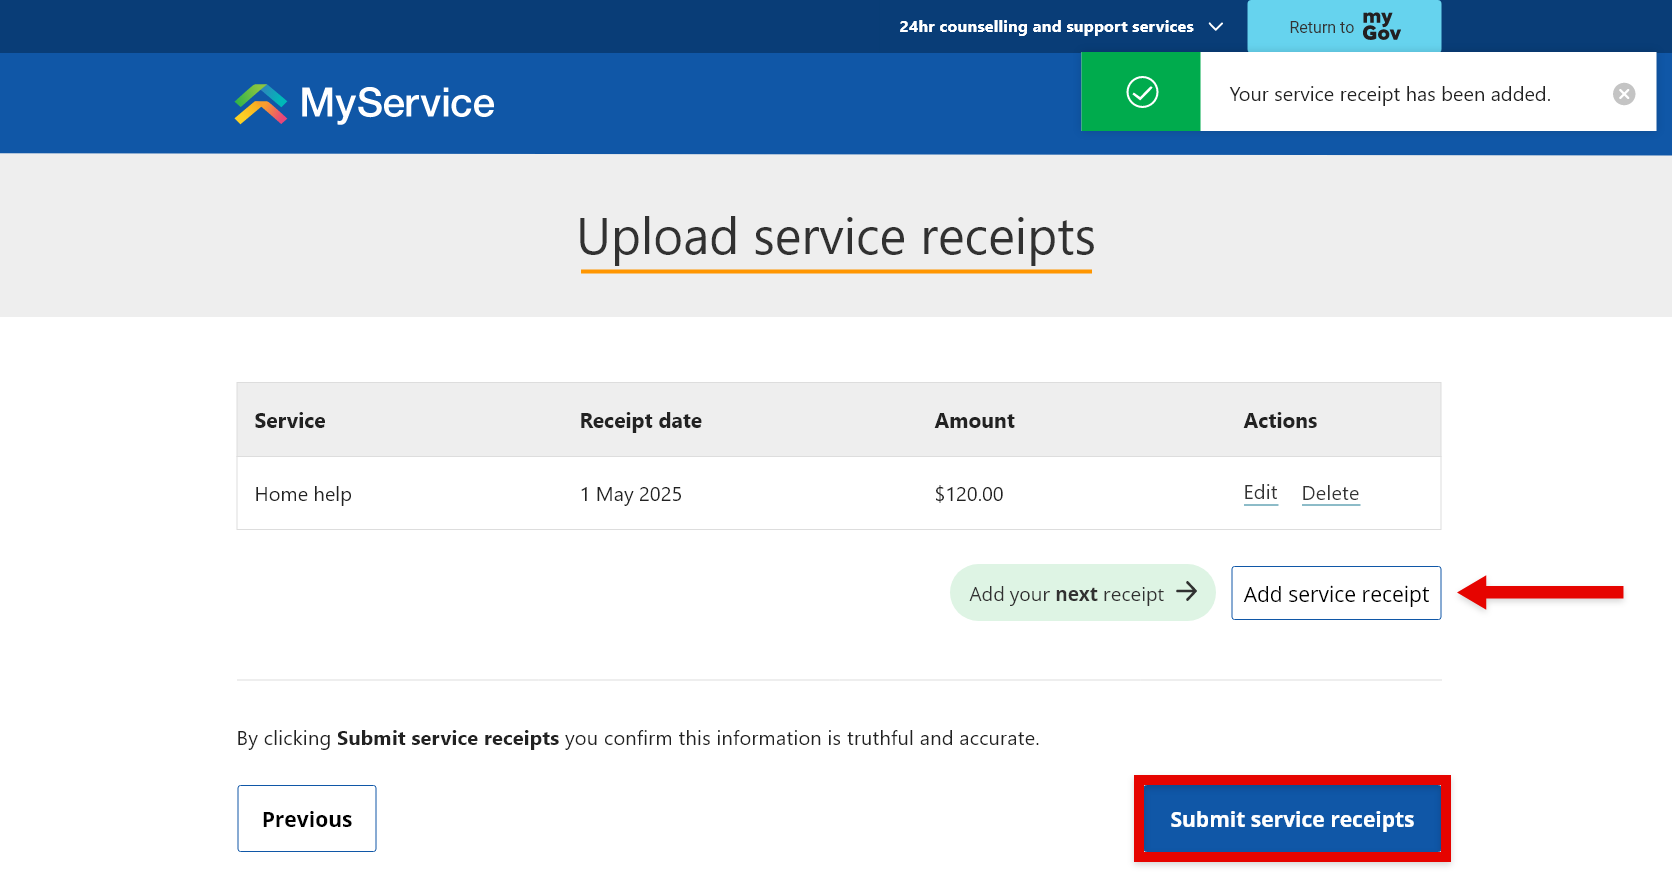
Note: Your receipts won’t be processed until you select Submit service receipts. From here, they will be submitted to us for review.
Save a draft of your receipts (if needed)
If you move away from the screen before you select Submit service receipts, your list of receipts you have added will be saved for you.
When you return to the Acute Support Package screen, there will be an orange notification box with a link to Return to upload service receipt. Select this link to complete the submission process.
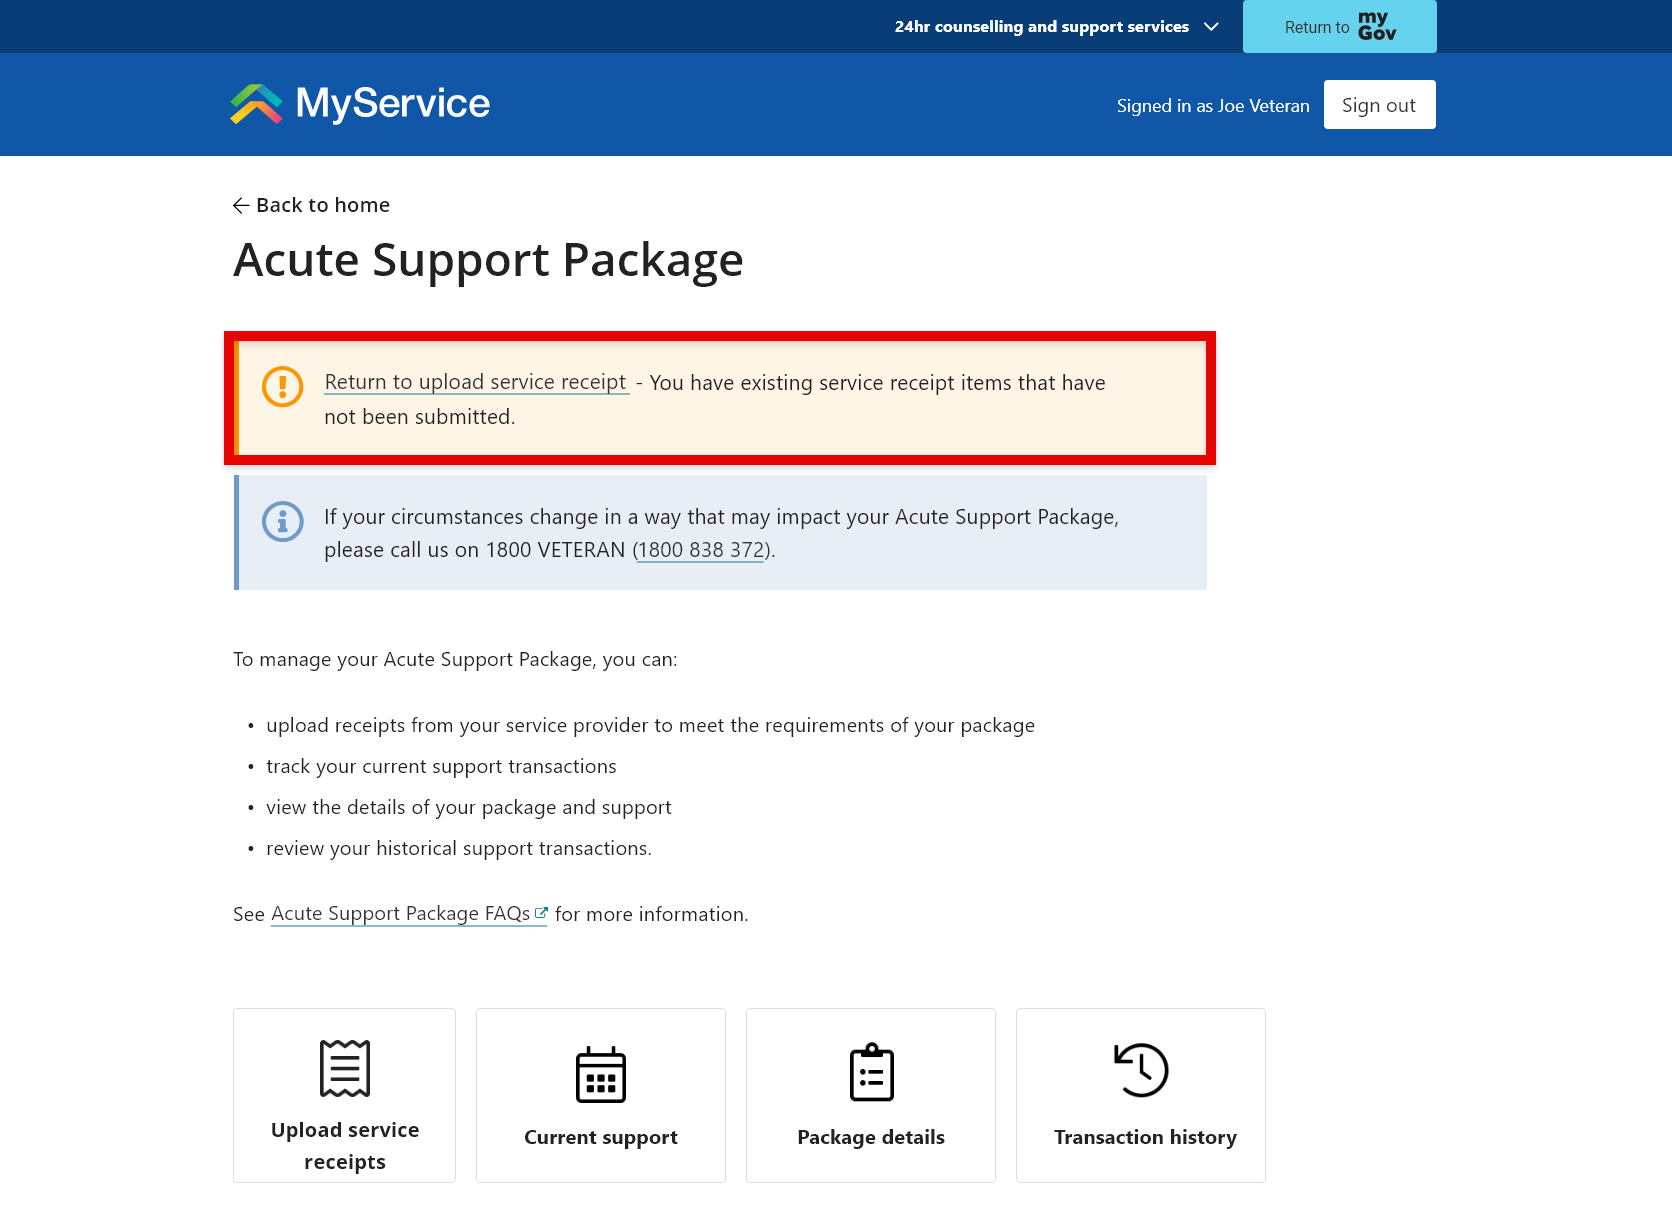
Important things to note about saved service receipts:
- Saved receipts have been added but not submitted.
- You need to either update, delete or submit these receipts within 90 days, otherwise they will be automatically removed from the system.
- Each time you make an update to your list of added receipts, the system timer is reset to 90 days.
Track status of uploaded receipts
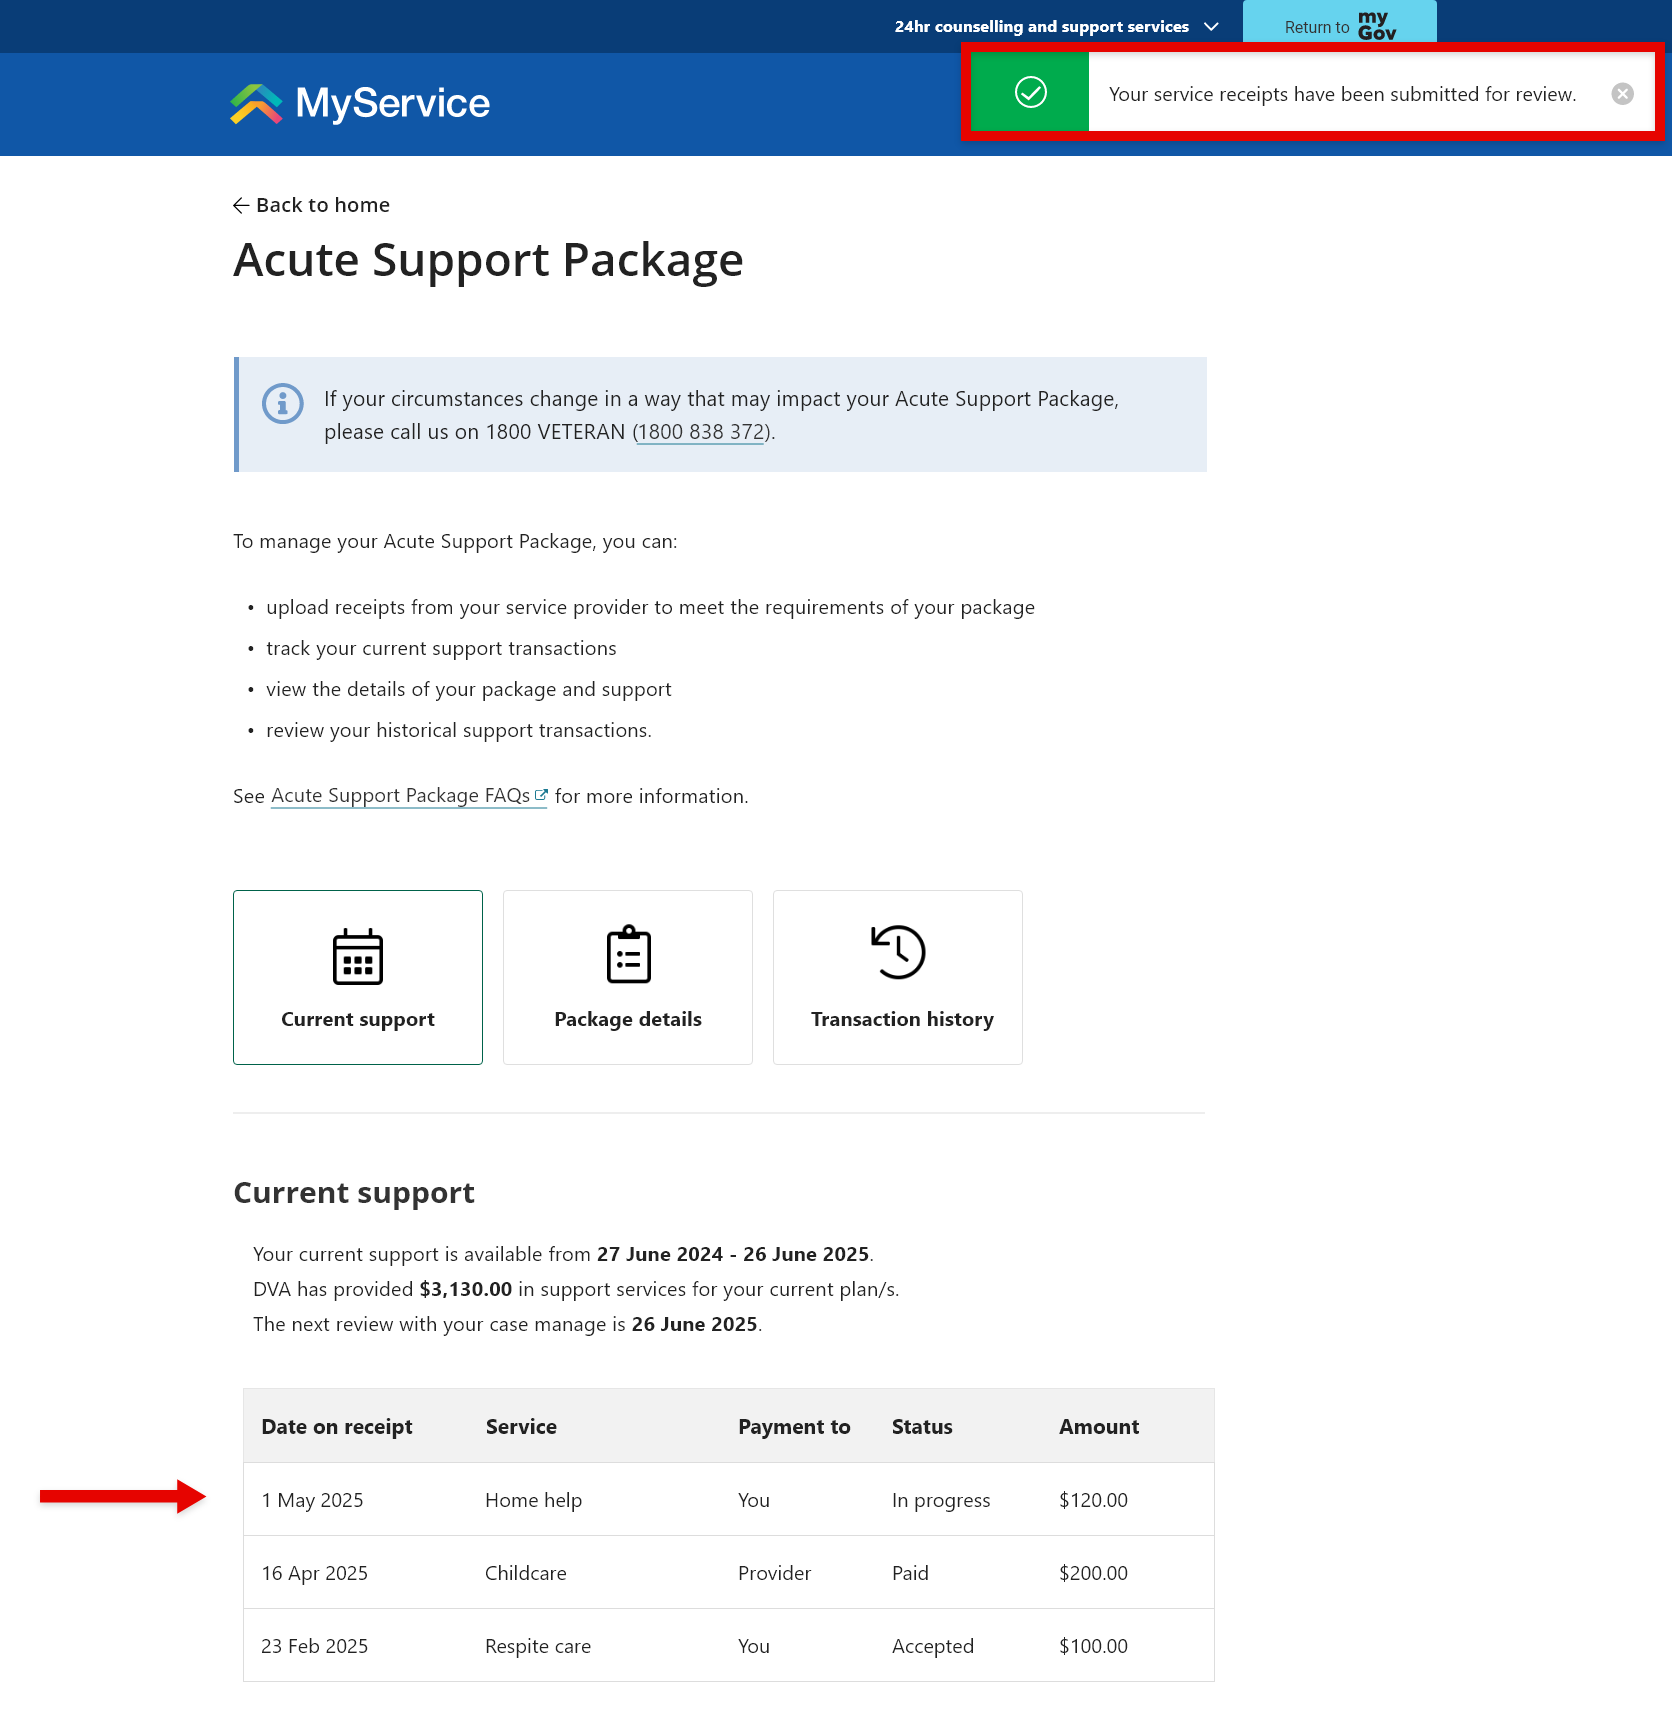
Once you have submitted your service receipts, you will be directed back to the Acute Support Package screen. Here another green success message will appear at the top right of your screen confirming your service receipts have been submitted for review.
You will find our new service receipts in the Current support summary list with the status of In progress. This status will update once we have reviewed your receipts.
You can check the status of a receipt any time you visit MyService.
If you need further help or support managing your Acute Support Package, you can contact us on 1800 VETERAN (1800 838 372).
Back to top